How to Teach a Kid to Ride a Bike
A New and Better Way to Teach Your Child?
The majority of us as kids learned how to ride a bike with training wheels. As times have changed there is a better and safer method that is sweeping the nation. Balance Bikes, This approach has completely changed the way kids learn to ride bikes by teaching them how to balance on their bike before pedaling.
It’s all about priority: balance and steering come before pedaling.

The problem with old-school training wheels is that they teach pedaling first. So once you finally remove the training wheels, your child is back at the starting line, attempting to balance themselves on the bike. This method is more effective and a faster approach that will have your child riding in no time. You can also keep the pedals off of a Guardian Bike to act as a balance bike for your learning child.
Balance bikes typically are made for the ages of 18 months – 3 years old. If your little bike rider is already past that age, don’t fret as you can still teach your kid the balance-bike method with a pedal bike. It is as simple as removing the pedals so that your child can push the bike forward with their feet. Once they get the hang of balancing, the pedals go back on. With this approach, they’ll never have to use training wheels. You’ll be amazed at how quickly your child will take to bike riding once they have mastered balance.
Our customers have raved about the success of this method, and we believe you will too. Keep in mind that every child’s learning curve is different, so the timeframe may vary. Of course, you'll be there to encourage your little bike rider through this childhood milestone.
Watch this video on how to teach your child to ride a bike.
Ready to teach your child how to ride a bike?
PART 1 | Before Teaching Your Kid to Ride
PART 2 | Teaching Your Kid to Ride a Bike in 3 Simple Steps
PART 3 | Teaching Your Kid How to Use Their Brakes
PART 4 | Need a Bike? 3 Things You Must Know Before Buying a Bike
Before Teaching Your Kid to Ride
i) Make sure they wear a helmet. Don’t know how to measure the head for helmet size? The bike helmet should sit level on your child’s head, across the middle of the forehead, and at least one inch from the eyebrows. If it sits too high on the forehead or moves too easily from side to side or front to back, you’ll want to adjust it for a better fit or possibly buy a different size. Keep in mind that bike safety for kids should always be the number one priority. Make sure your child is wearing protective gear at all times when learning how to ride.
You may also consider gloves, elbow-guards and shin-guards.
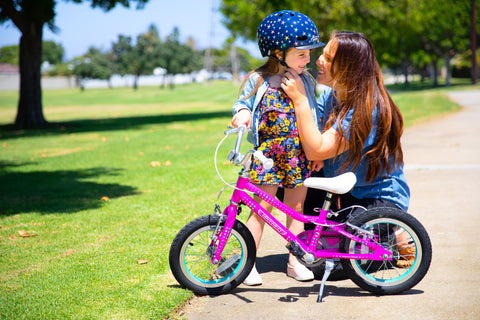
ii) Make sure the bike tires are properly inflated. To achieve a smoother, safer ride for your child — and easier coasting — make sure their bike tires are inflated to the appropriate pressure. This information is almost always found on the side of the tire (i.e. inflate to 40 - 65 PSI).
iii) Remember to have fun! Teaching your child a new skill can be stressful (for both of you). There may be times when your kid wants to throw in the towel. It’s up to you to encourage them to keep trying. Riding a bike will be a source of confidence and freedom as they grow.
Take your time. Loosen up. Laugh! And trust the process!
Teaching Your Kid to Ride a Bike in 3 Simple Steps
Step 1: Walk the bike with no pedals
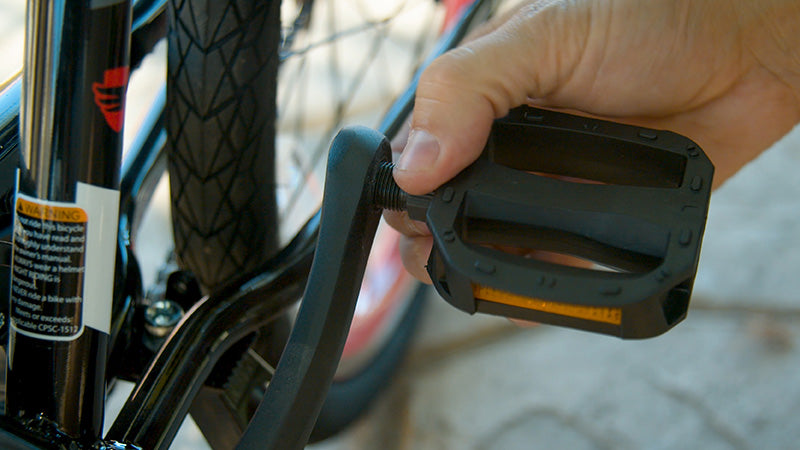
Remove the pedals so that your child can easily walk the bike while sitting on the seat. The right pedal loosens to the left, while the left pedal is reverse threaded so it will loosen by turning it right. All Guardian Bikes ship with the pedals off the bike and come with a 15mm pedal wrench.
Lower the seat, so your child's feet are flat on the ground. More kids can have their heels off the ground up to 1 inch. This will give them a sense of comfort because they can still touch the ground. The video below shows you how to quickly move the seat up or down if your bike has a quick release.
On a flat surface allow your child to walk the bike. This gives them a feeling of control and helps them get familiar with the sensation of balancing and steering the bike.
Keep them working on this until they get the hang of it. You will begin to notice them have more control over the bike, and that will be your cue to move to step 2.
Step 2: Coast on your bike with your feet up
With their feet up, have your child coast down a slight slope. This gentle decline will help them adjust to the momentum without making them nervous. It will also help them acclimate to balancing themselves. Remember: small slopes are ideal here.

Stay at the bottom of the slope, so that they see you as they descend toward you. This will help with your child’s peace of mind and give them a target to aim towards as well as help them focus on looking straight ahead.
Time them as they ride down the slope. You can count off (“1-2-3-4-5!”). This turns it into a game and encourages them to keep their feet up. When they can coast consistently for 15 seconds, it’s time to install the pedals.
Step 3: Ride your bike with the pedals on!!
Install the pedals so that they can practice riding for real! Remember from our pro tip above that the right pedal tightens clockwise, and the left pedal tightens counter-clockwise on a Guardian Bike. If you need help installing the pedals, the video below is a great resource.
Hold onto their side and have your child start to pedal the bike. This will help them learn the concept of pedaling, which they will pick up much quicker than the balancing they already practiced in steps 1 and 2.

Teach your kid how to start from a stopped position. They should start with one foot on the ground and have the opposite foot on the pedal at the 2 o'clock position (see the image below for reference). This position will allow your child to push down on the pedal and start to generate momentum immediately, which is the key to balancing. They may tip over a few times during this process, but you will be amazed at how quickly they will be pedaling on their own!
"Life is like riding a bicycle. To keep your balance, you must keep moving."
- Albert Einstein
Teaching your kids how to use their brakes
You’ll never forget the sight of your child riding away after you let go, but don’t forget to teach them how to stop! As we mentioned earlier, foot brakes and even hand brakes can be a challenge to a child. That’s why we recommend our SureStop braking system. Here are tips for each braking type:
Coaster (back-pedal) Brakes
To activate the coaster brake, have your child spin the pedals backwards. If the pedals are at noon and 6 o'clock, they may need to pedal forward a quarter turn and then spin the pedals backward. Although you may have learned how to ride a bike on coaster brakes, we don’t recommend them to kids.
Two Lever Brakes
To activate the brakes, your child will need to pull the brake levers on the handlebar. The right brake lever is for the rear wheel, and the left lever is for the front wheel. Teach your child only to pull the right lever, so they don't lock up the front wheel and go over the bars. At some point, they will need to start learning to modulate the front brake because most of the stopping power comes from your front wheel. This can often be confusing for kids. Too much front brake may result in over the handlebar accidents, and too much back brake results in slower stopping times.
SureStop Braking System
To activate the brakes, your child will simply need to grab the single brake lever, and our patented brake system will distribute the braking power to both wheels while preventing any head-over-handlebar accidents.
Need a Bike? 3 Things You Must Know Before Buying a Bike
i) Size is everything. Put your child on the right-size bike, and you’re already halfway there. Need help determining the best size bike for your child? Use our easy RideSizer® tool.ii) Don’t skimp when it comes to quality. Most higher-quality bikes are lightweight, which should allow your child better control and balance. The majority of kids’ bikes on the market weigh an average of 33 pounds, with the average kid riding them at only 44 pounds — that’s 75% of the child’s weight! That’s why the lightweight design of Guardian Bikes is so important for kids.
iii) Avoid coaster brakes. When a kid is learning to ride a bike, they may instinctually pedal backward when they feel they are losing their balance. If your child’s bike has coaster brakes this stops them from gaining that balance just as they were getting the hang of it. Coaster brakes also have a very slow stopping distance and in some cases can fail to stop on certain terrains. Instead, consider a bike with hand brakes, or our SureStop Brake System.
For more tips, check out our kids’ bicycle buying guide here.
Summary
Now you have all the steps and knowledge to teach your kid how to ride a bike without training wheels and why this method is more effective.
Remember
- Walk the bikes with no pedals
- Coast with feet up
- Ride the bike with pedals
- Know what kind of brakes your kid’s bike has and how they operate


